Introduction
Self-hosting a website means running the web server yourself — on hardware you own — rather than paying a hosting provider. You get full control over the server, the software stack, and the data. The catch has traditionally been networking: to make a server reachable from the internet, you need to open ports on your router, deal with a dynamic public IP, and expose your home network to the internet.
Cloudflare Tunnel solves all of that. Instead of opening ports, you install a small agent (cloudflared) on your server. It creates an outbound encrypted connection to Cloudflare's network. Cloudflare proxies traffic from your domain through that tunnel to your server — no open ports, no dynamic DNS, no exposing your home IP. The entire setup is free for personal use.
By the end of this guide you will have a publicly accessible website running on Ubuntu Server, served by Apache, behind your own Cloudflare-managed domain.
Prerequisites
- A machine to use as the server — a spare PC, laptop, Raspberry Pi, or VM. Needs to be able to run Ubuntu Server 22.04 or later
- A Cloudflare account — free tier is sufficient. Sign up at cloudflare.com
- A domain name — purchased through Cloudflare Registrar (covered in this guide) or transferred in from another registrar
- Internet access on the server machine — the tunnel requires outbound HTTPS (port 443)
- A separate computer for the initial setup — to flash the Ubuntu ISO and SSH into the server
Step 1 — Install Ubuntu Server
Ubuntu Server is a headless Linux distribution — no desktop environment, no GUI. It is lightweight, well-documented, and the most common choice for self-hosted web servers.
Download and flash the Ubuntu Server ISO
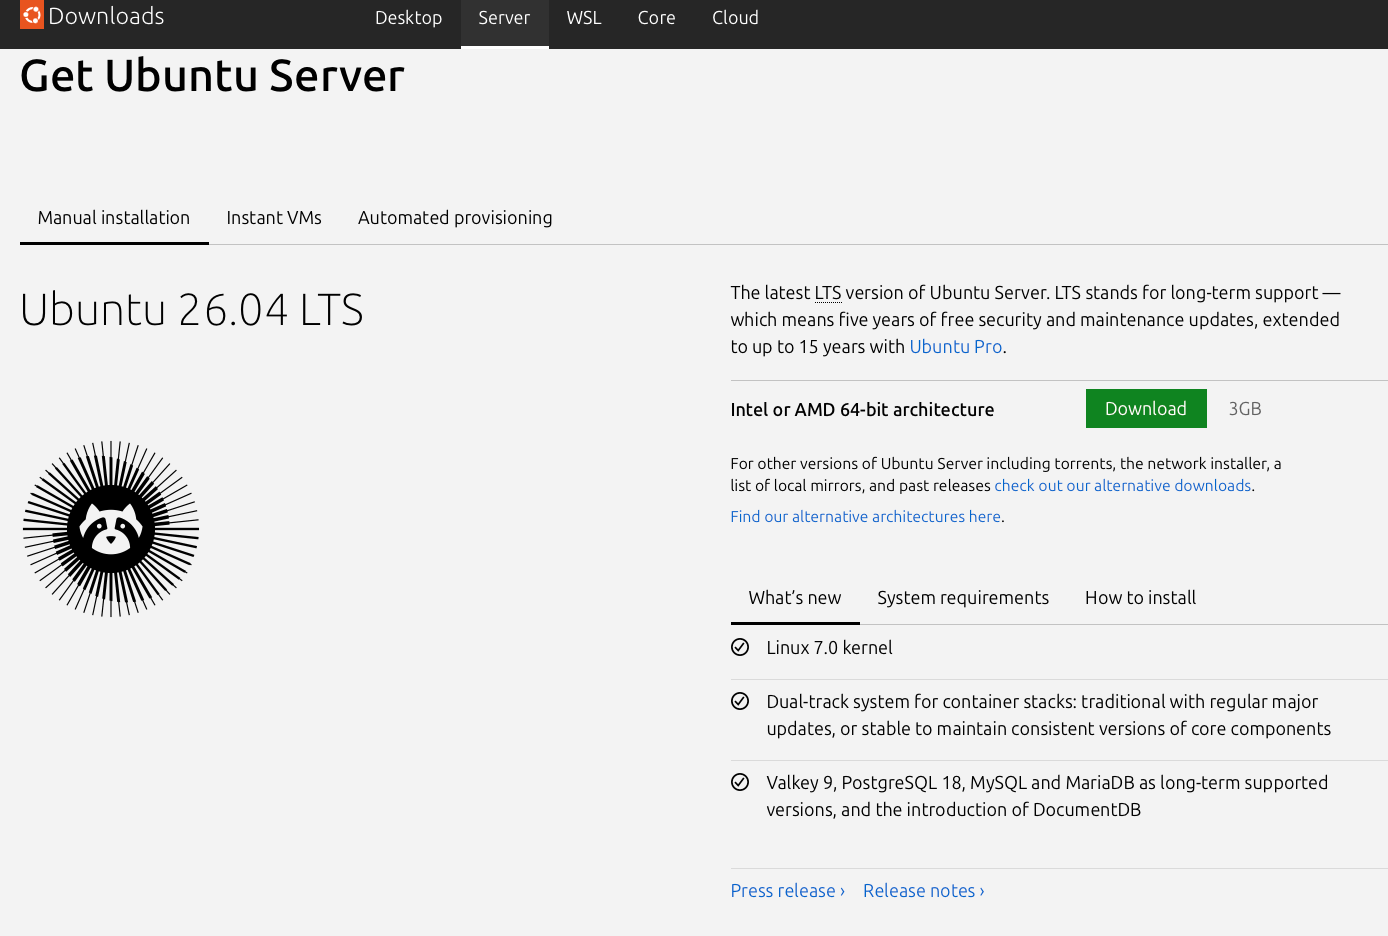
Download the Ubuntu Server 22.04 LTS ISO from ubuntu.com. Flash it to a USB drive using Balena Etcher (Windows/macOS/Linux) or Rufus (Windows). LTS (Long Term Support) releases receive security updates for five years — always prefer LTS for a server.
Boot from USB and run the installer
Plug the USB into your server machine, boot from it (usually F12 or F2 to enter the boot menu), and follow the Ubuntu Server installer. Key choices to make during installation:
- Network — connect to your local network. Note the IP address assigned — you will SSH into it shortly
- Storage — use the entire disk with default partitioning unless you have a specific reason not to
- Profile — set a username and strong password. This is your main admin account
- SSH — when the installer asks, tick Install OpenSSH server. This lets you manage the machine remotely without a monitor attached
- Snaps — skip all optional snap packages for now
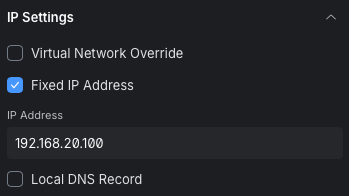
/etc/netplan/ or on your router by assigning a DHCP reservation to the server's MAC address.
SSH into the server from your main machine
Once installation is complete and the server has rebooted, SSH into it from your main computer. Replace SERVER_IP with the IP address shown during installation, and your-username with the username you created.
ssh your-username@SERVER_IPUpdate the system before doing anything else:
sudo apt update && sudo apt upgrade -y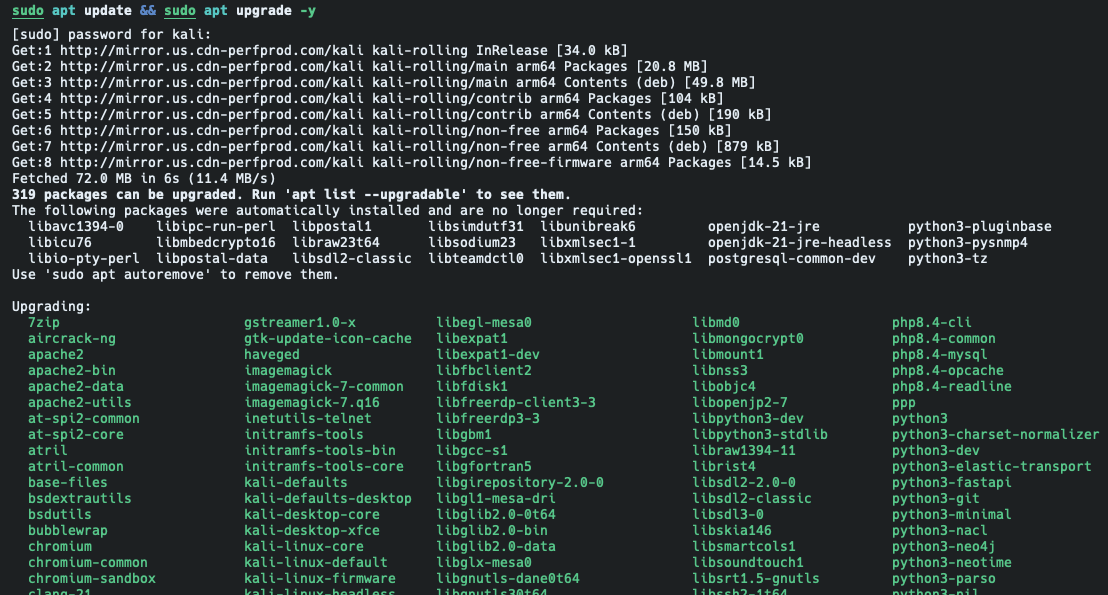
Step 2 — Install Apache
Apache is the web server that will serve your website files. It is one of the most widely used web servers in the world, well-documented, and available directly from Ubuntu's package repositories.
Install Apache and verify it is running
Install Apache with a single command. Ubuntu's package manager handles everything — dependencies, startup configuration, and the systemd service.
sudo apt install apache2 -yOnce installed, confirm Apache is running:
sudo systemctl status apache2You should see active (running) in green. Apache also starts automatically on boot — verify that with:
sudo systemctl is-enabled apache2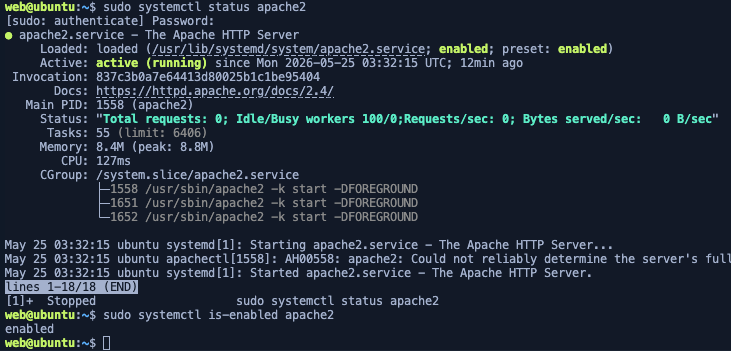
Test the default Apache page
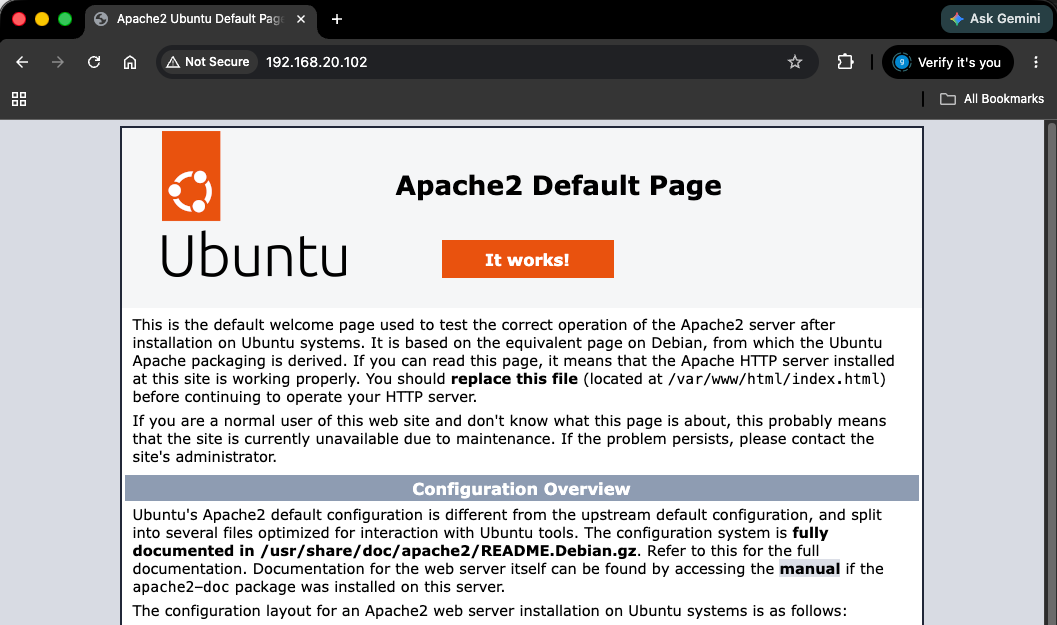
From your main machine, open a browser and navigate to http://SERVER_IP. You should see the Ubuntu/Apache default welcome page. This confirms Apache is serving content correctly on your local network.
Place your website files
Apache's default web root is /var/www/html/. Replace the default index.html with your own, or drop your entire site into that directory. The simplest test is to create a basic HTML file:
sudo nano /var/www/html/index.htmlPaste in your HTML, save with Ctrl+O then Enter, and exit with Ctrl+X. Refresh the browser — your page should appear immediately.
sudo chown -R www-data:www-data /var/www/html/ to set the correct ownership.
Step 3 — Buy a Domain on Cloudflare
Cloudflare Registrar sells domains at cost — no markup, no renewal price hikes. You will also need a Cloudflare account to set up the tunnel, so buying the domain here keeps everything in one place.
Register a domain through Cloudflare
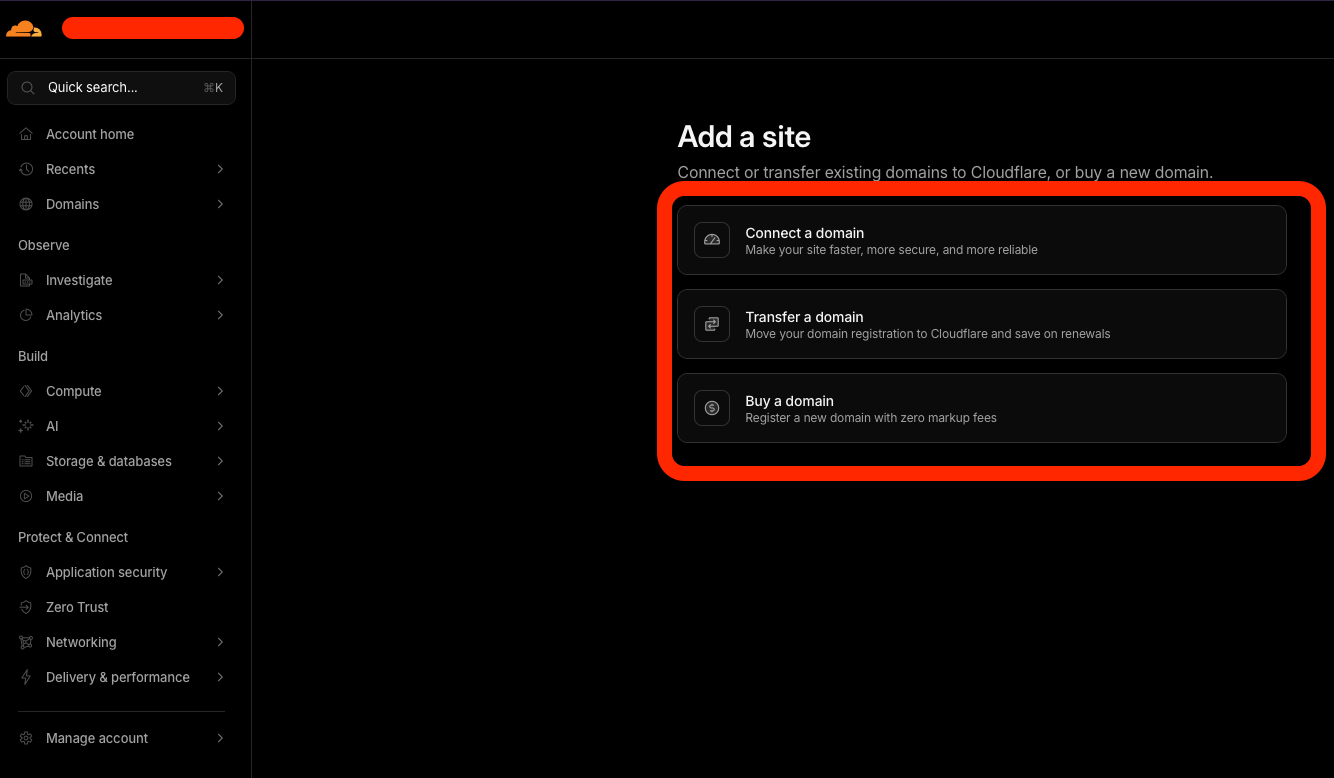
Log in to your Cloudflare dashboard at dash.cloudflare.com. In the left sidebar, go to Domain Registration → Register Domains. Search for the domain name you want, select it, fill in your contact details, and complete the purchase. The domain will appear in your Cloudflare account within a few minutes.
Step 4 — Set Up a Cloudflare Tunnel
A Cloudflare Tunnel creates an encrypted outbound connection from your server to Cloudflare's edge. Traffic arriving at your domain is routed through Cloudflare's network and down the tunnel to Apache — without any open ports on your router or your home IP being exposed.
Install cloudflared on the server
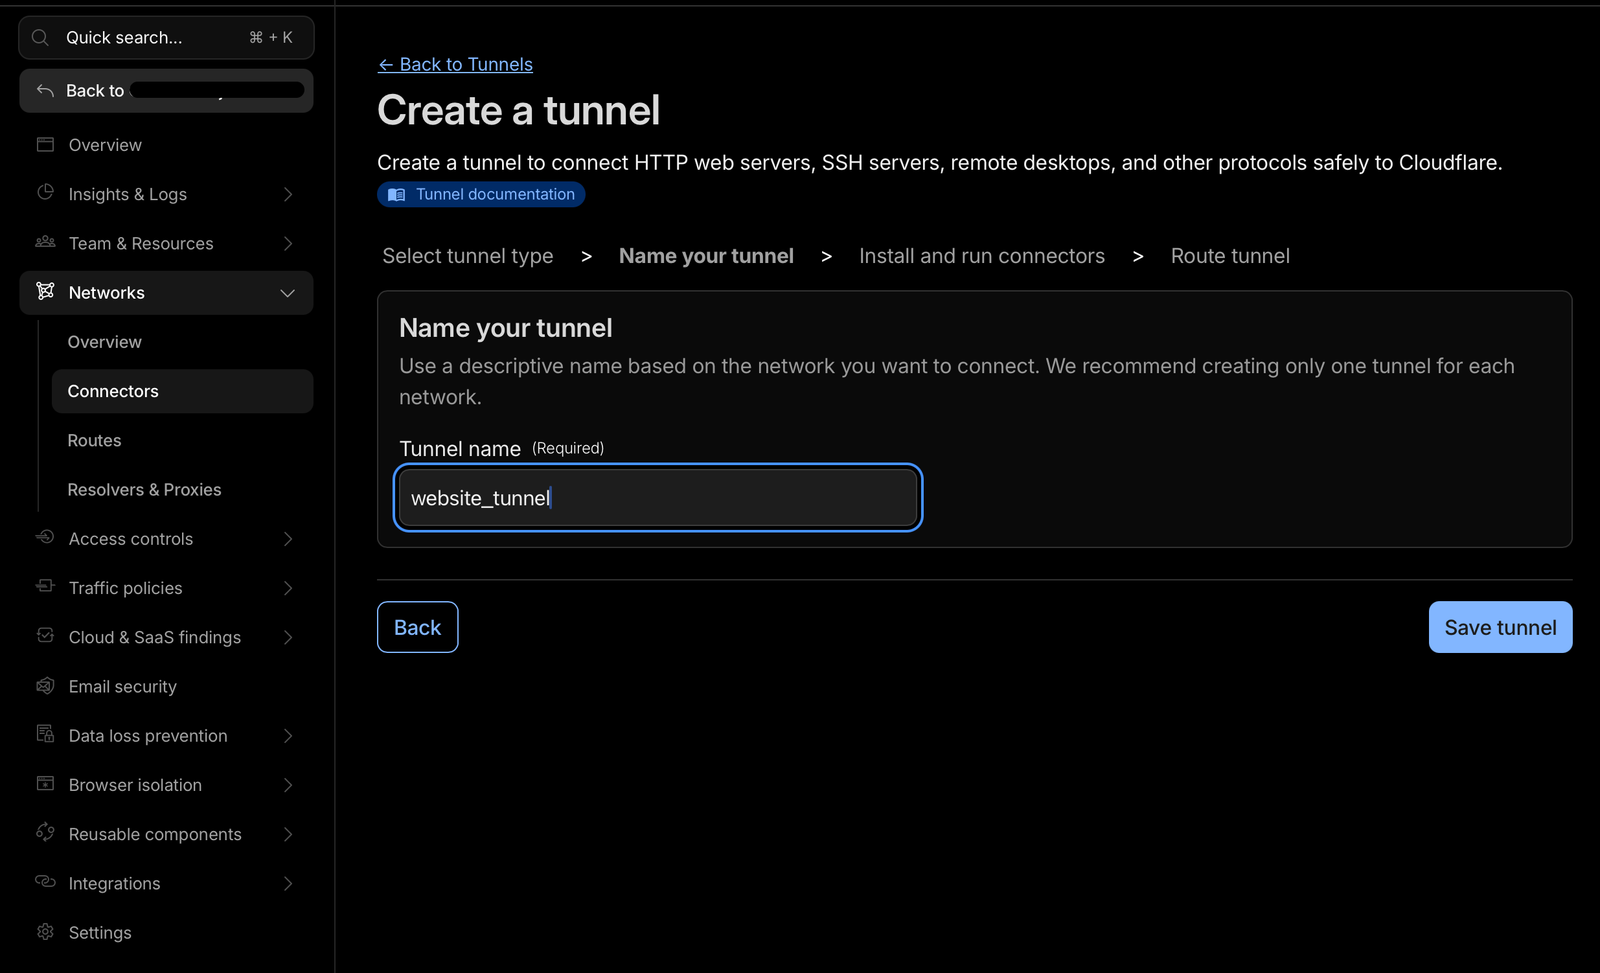
On your Cloudflare dashboard click
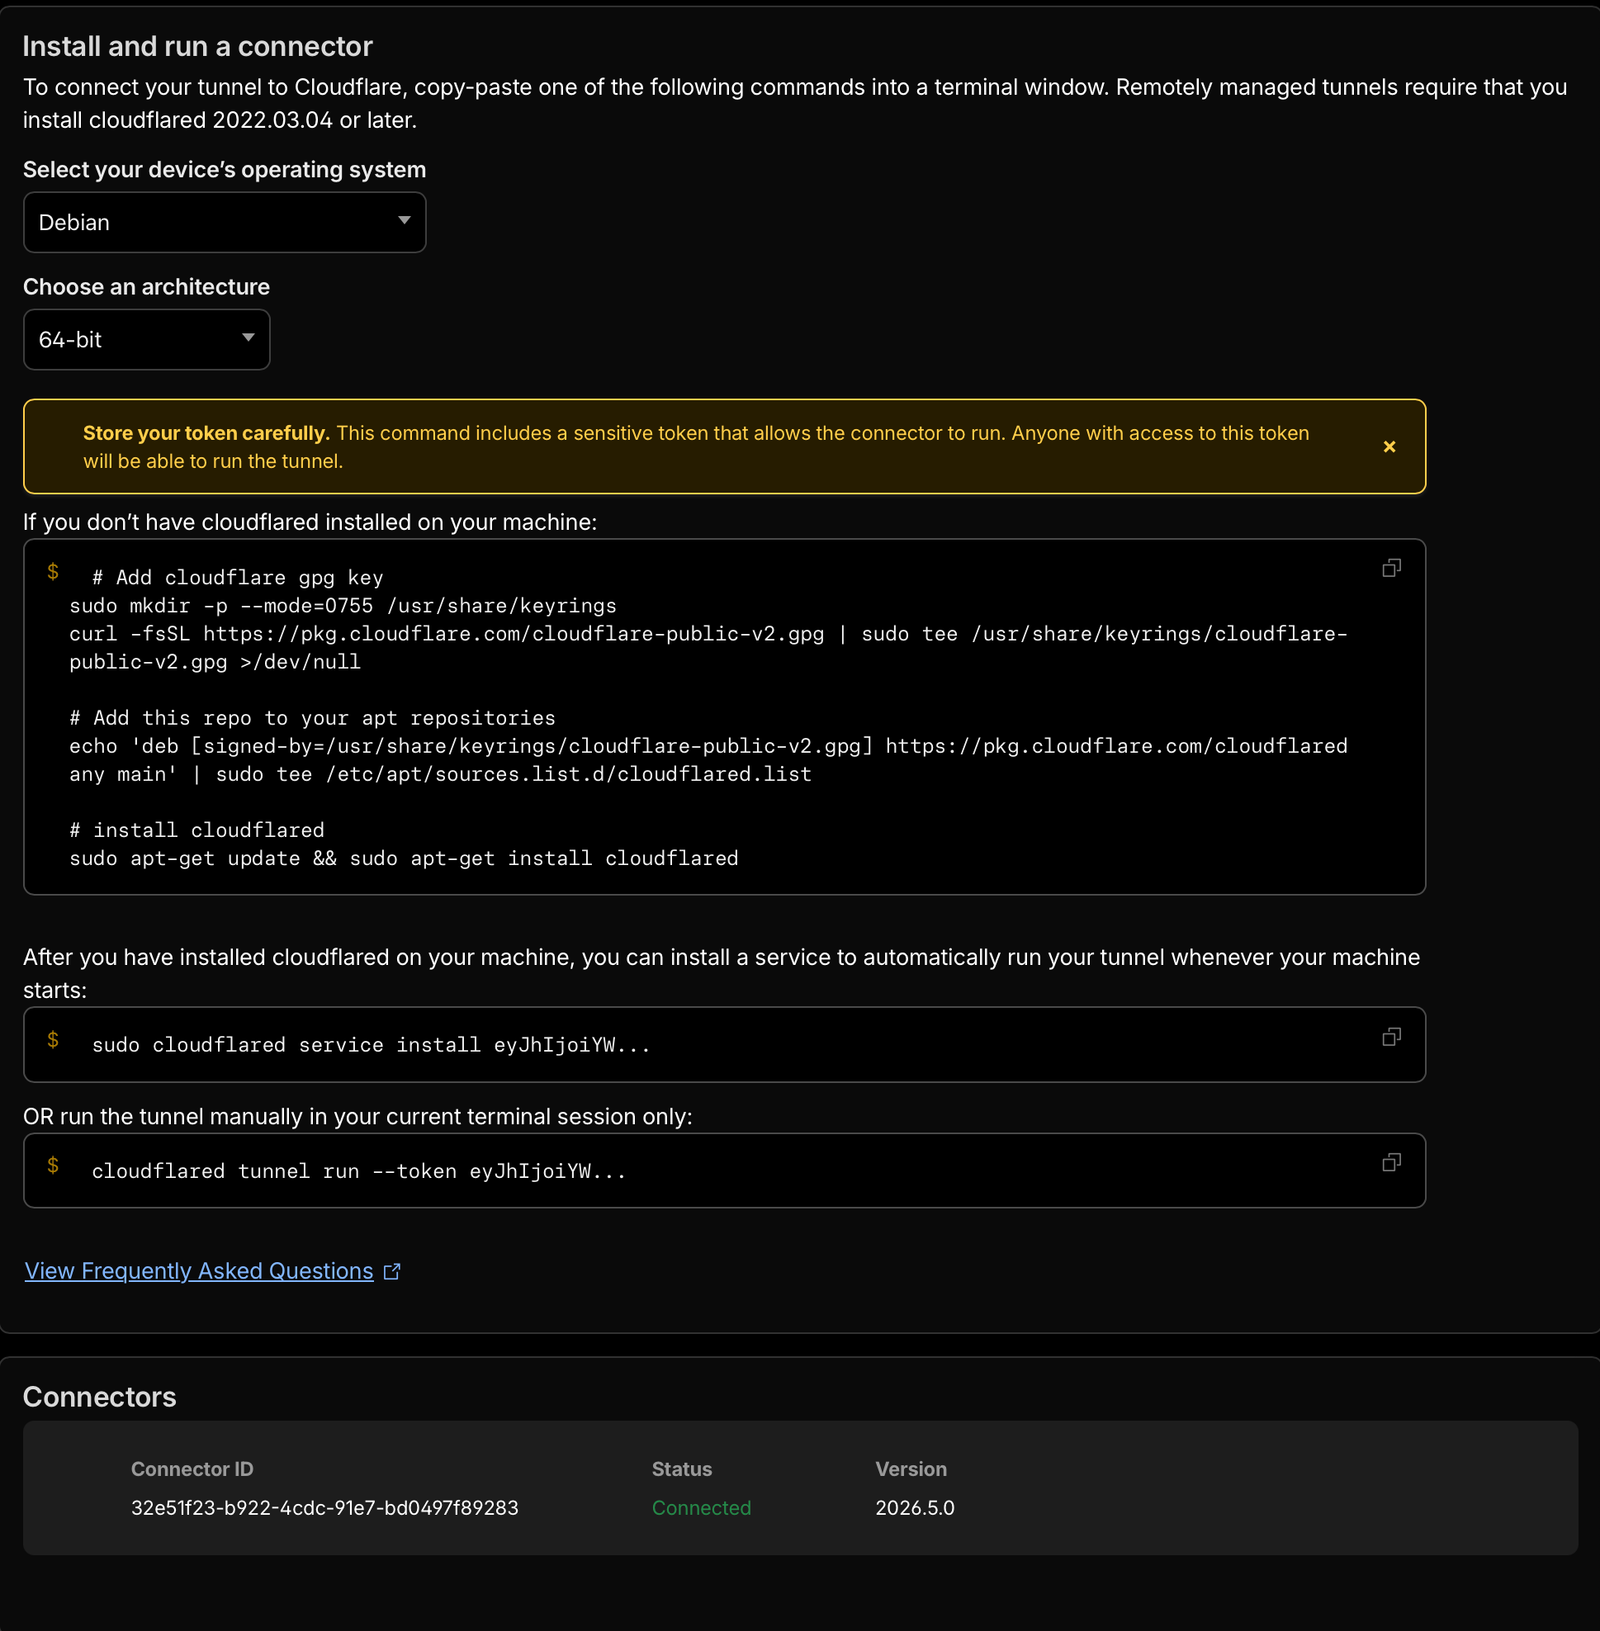
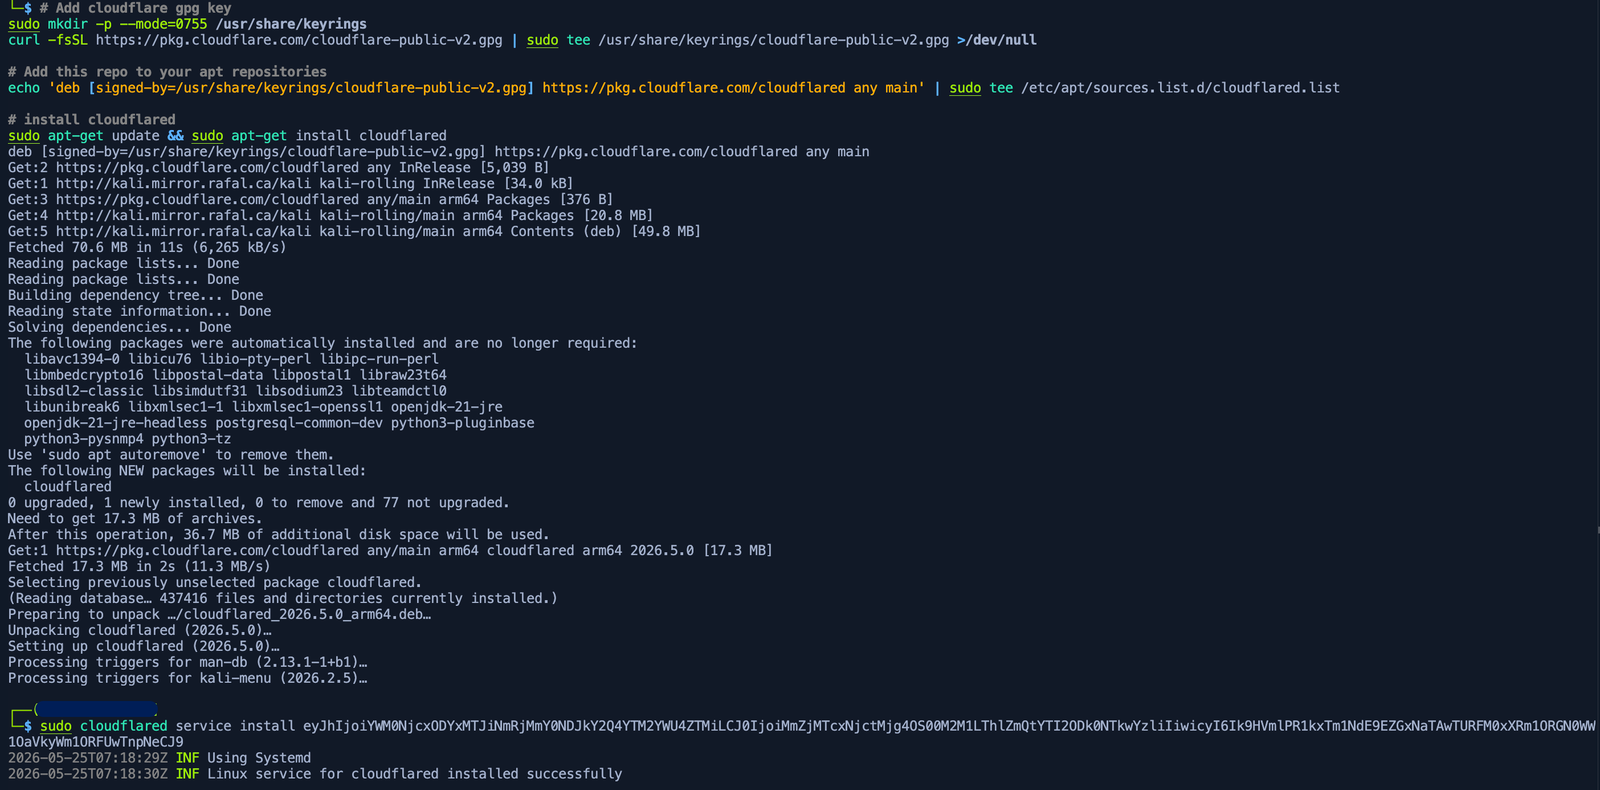
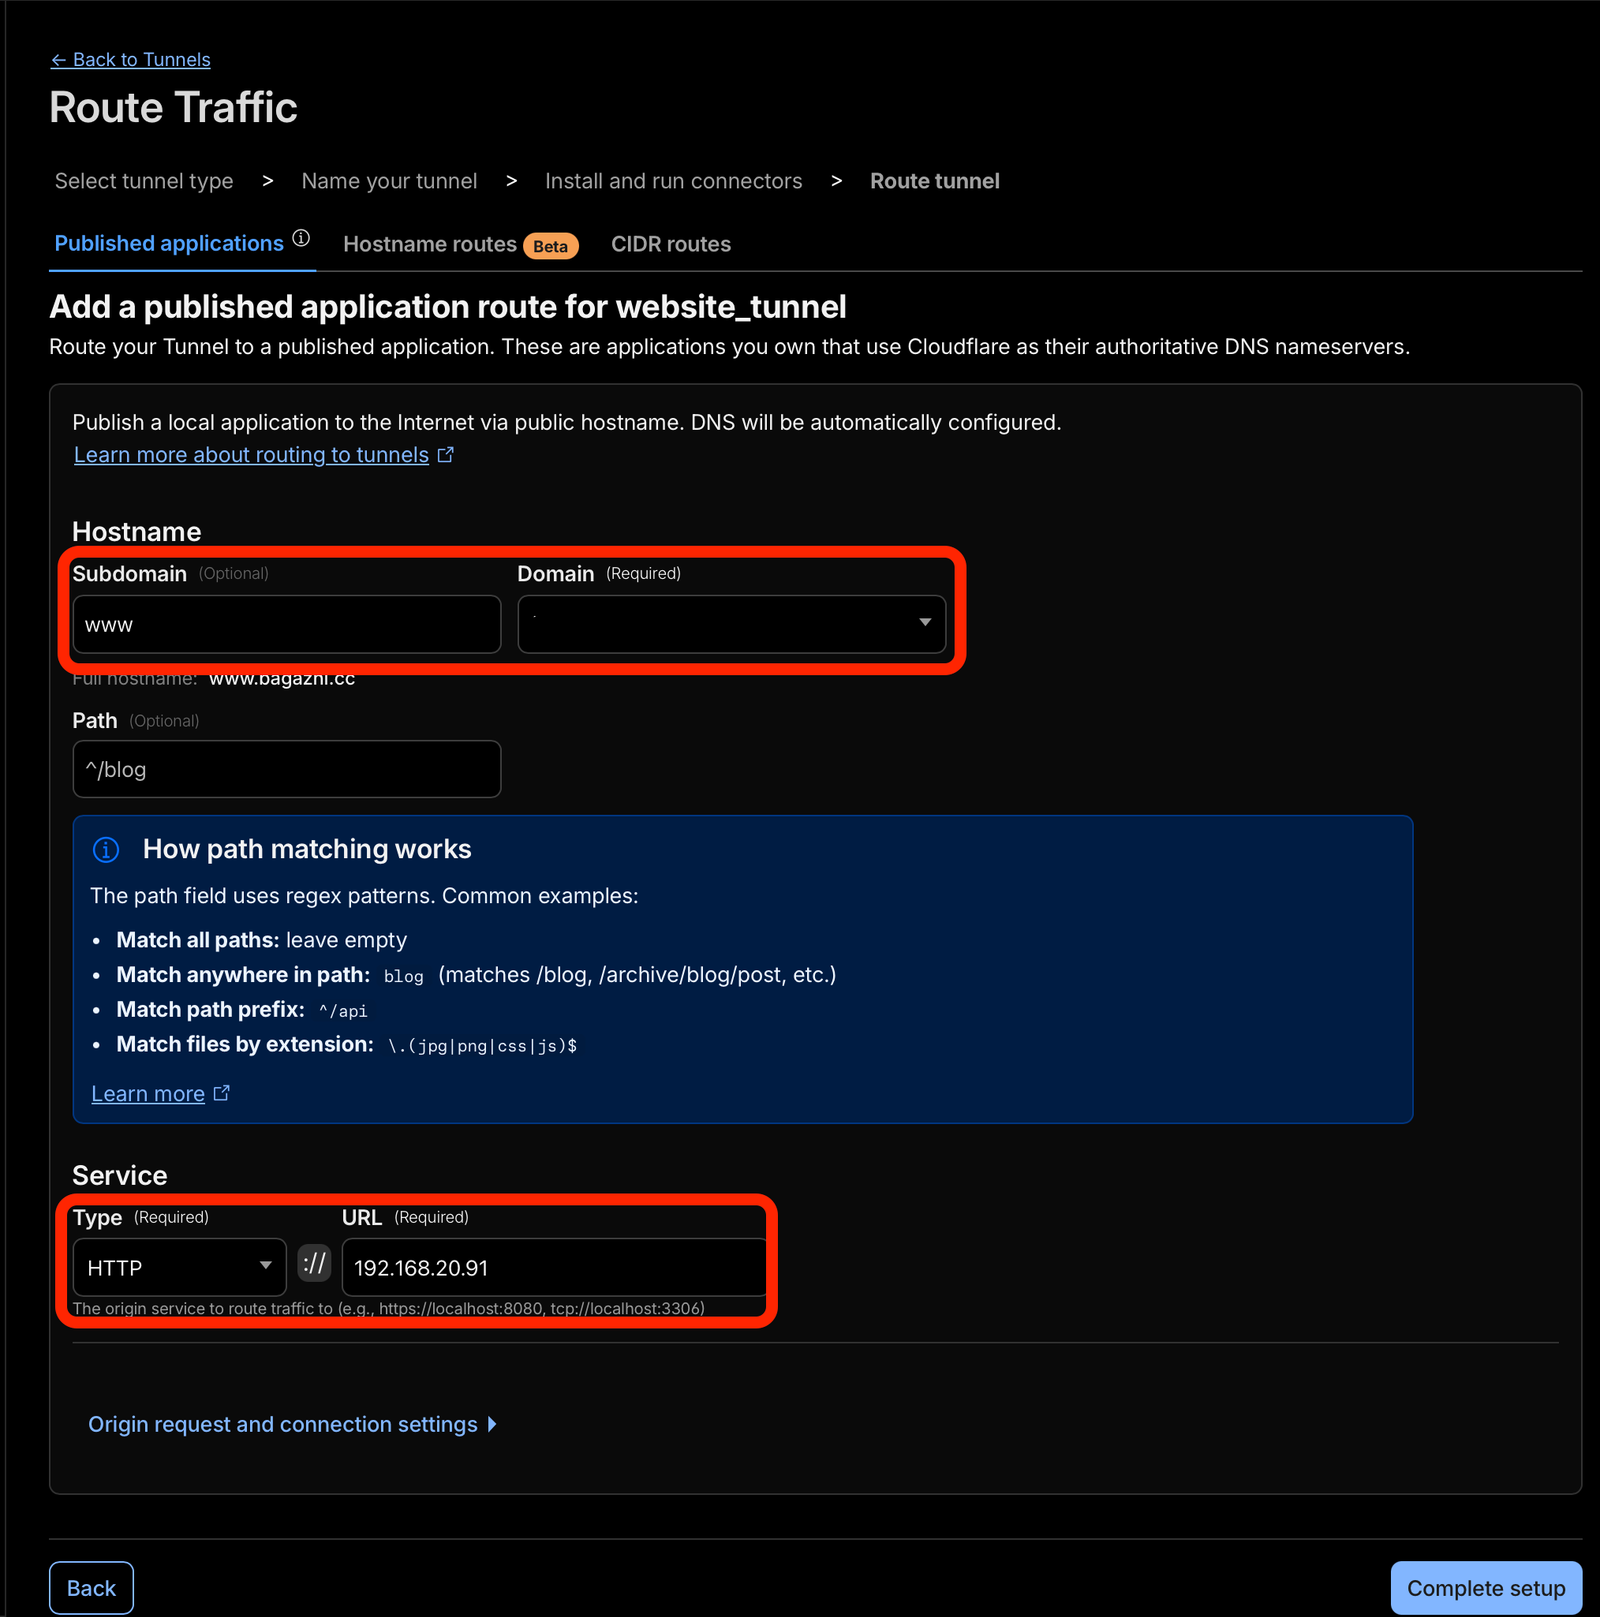
If the tunnel is connected properly it will give you a checkmark and say "Connected". If you click on the tunnel you can see the details and metrics, you can also click on "Public Hostname" to see your website live on the internet. If you have any issues with the tunnel not connecting, make sure your server has outbound internet access and that you followed the installation steps correctly other than that feel free to type your domain on the browser URL and have fun exploring the Cloudflare dashboard and its features because there is a lot more to explore.
Conclusion
You now have a fully self-hosted website running on your own hardware, served by Apache, behind a Cloudflare Tunnel — no open router ports, no exposed home IP, free HTTPS, and a real domain name. The server will survive reboots, the tunnel restarts automatically, and Cloudflare handles DDoS protection and TLS renewal without any ongoing work on your part.
From here you can extend the setup: host multiple sites by adding more ingress entries to the tunnel config, install a CMS like WordPress, add PHP and MySQL, or point subdomains at different services running on the same machine.